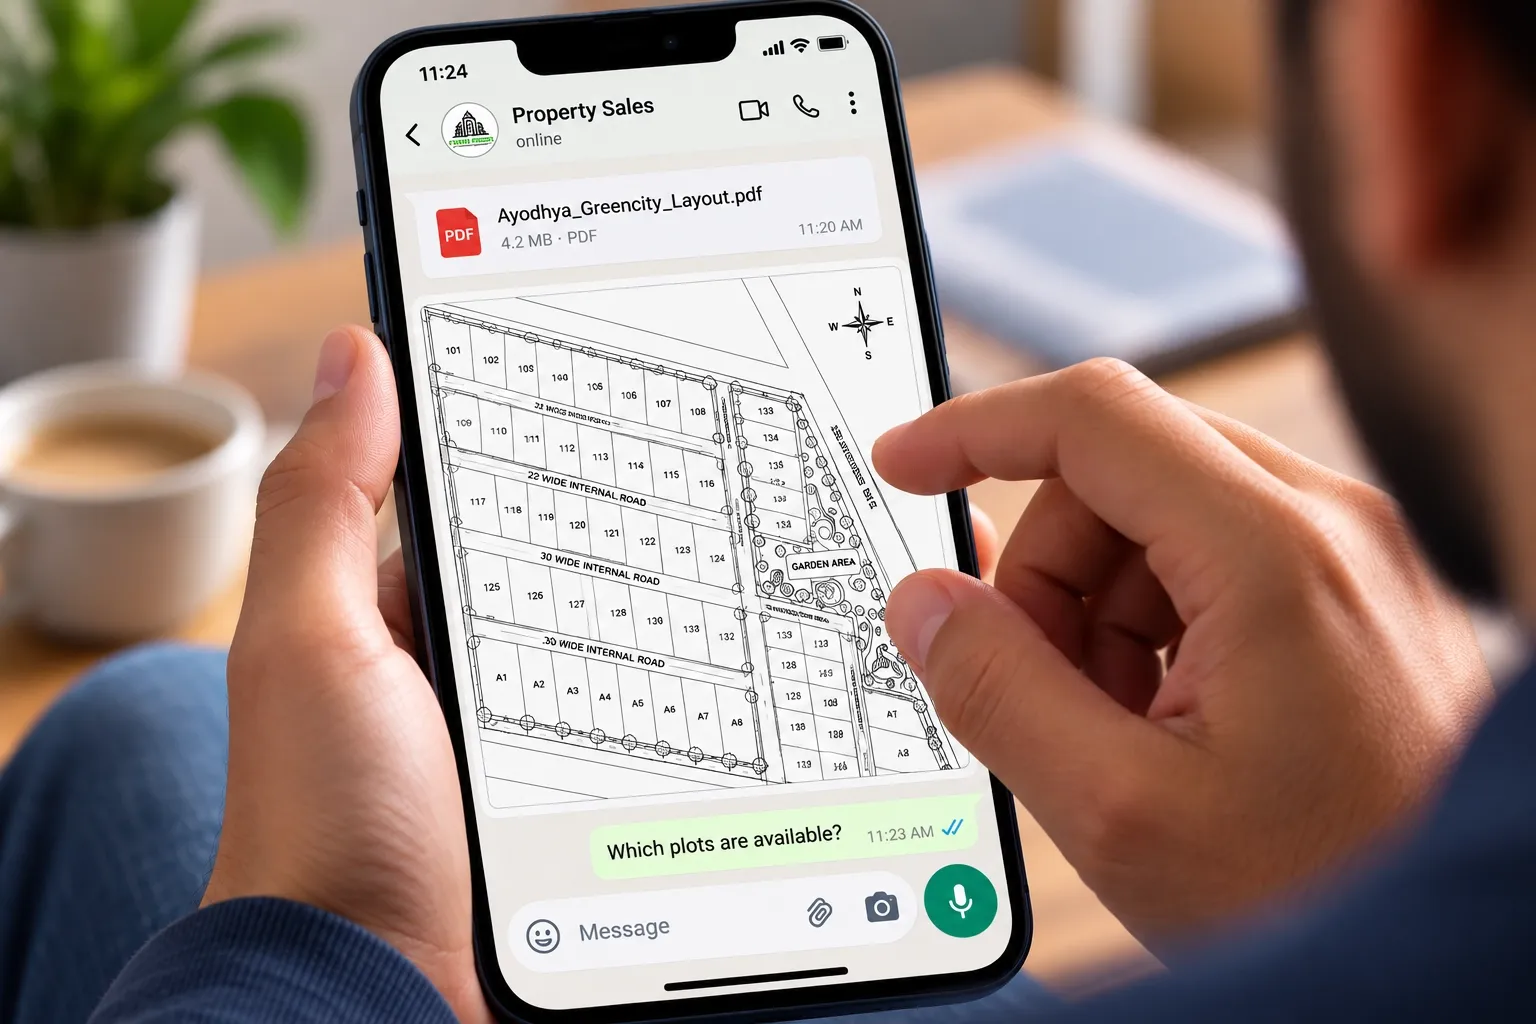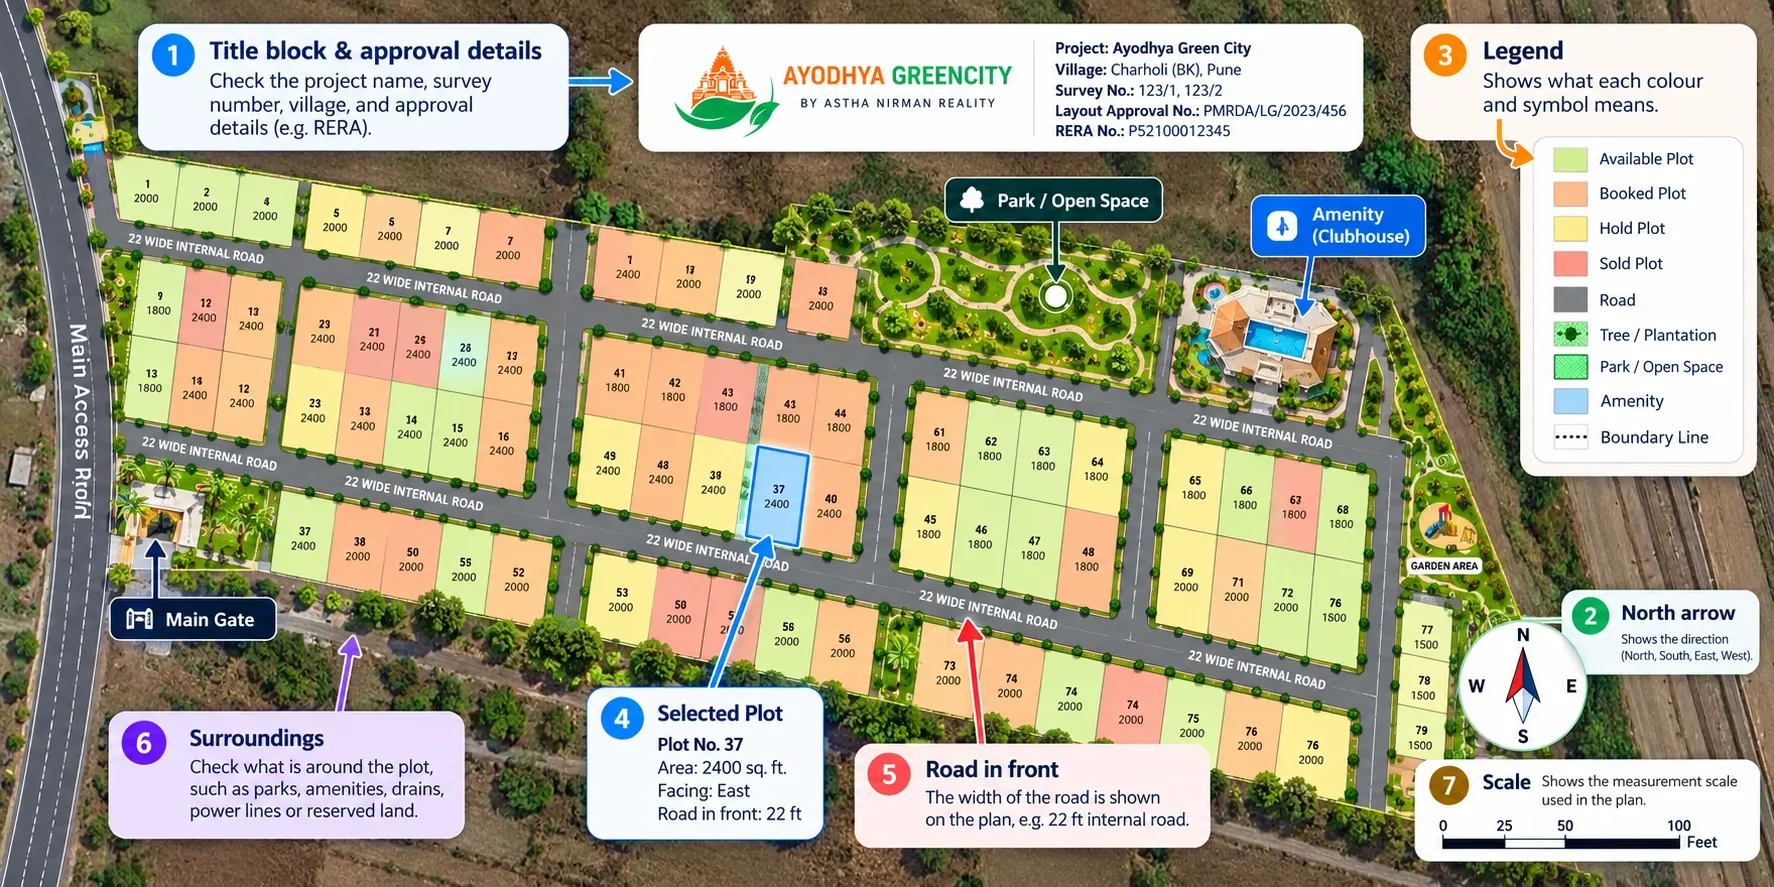
A broker sends you a site plan on WhatsApp. You see a maze of lines, tiny plot numbers, a few coloured patches and a small arrow in one corner. You like plot 37, but you can't tell which way it faces, how wide the road is or what that dotted line along its back edge means.
Here is the short answer. To read a site plan, start with the title block and approval details, then find the north arrow, scale and legend. Locate your plot by its number, check its dimensions, area and the road in front, and then look at what surrounds it: open spaces, amenities, drains, power lines and reserved land. Finally, match what the plan shows with what you see on the ground.
This guide walks you through each step, the labels you will see, the red flags to watch for and the questions to ask before you book.
Key takeaways
- A site plan tells you where your plot is, how big it is, which way it faces and what surrounds it. Read it before you discuss price.
- Always read the approved version. Check the approval reference, the date and the project's RERA registration number.
- The north arrow, scale and legend are the keys to everything else on the plan. Read them first.
- Check four things on your plot: plot number, side dimensions, total area and the width of the road in front.
- Look beyond your plot. Drains, power lines, reserved land and future roads can affect its value more than its size.
- A plan is a drawing. Confirm it on the ground before you pay a booking amount.
What a site plan shows (and what it doesn't)
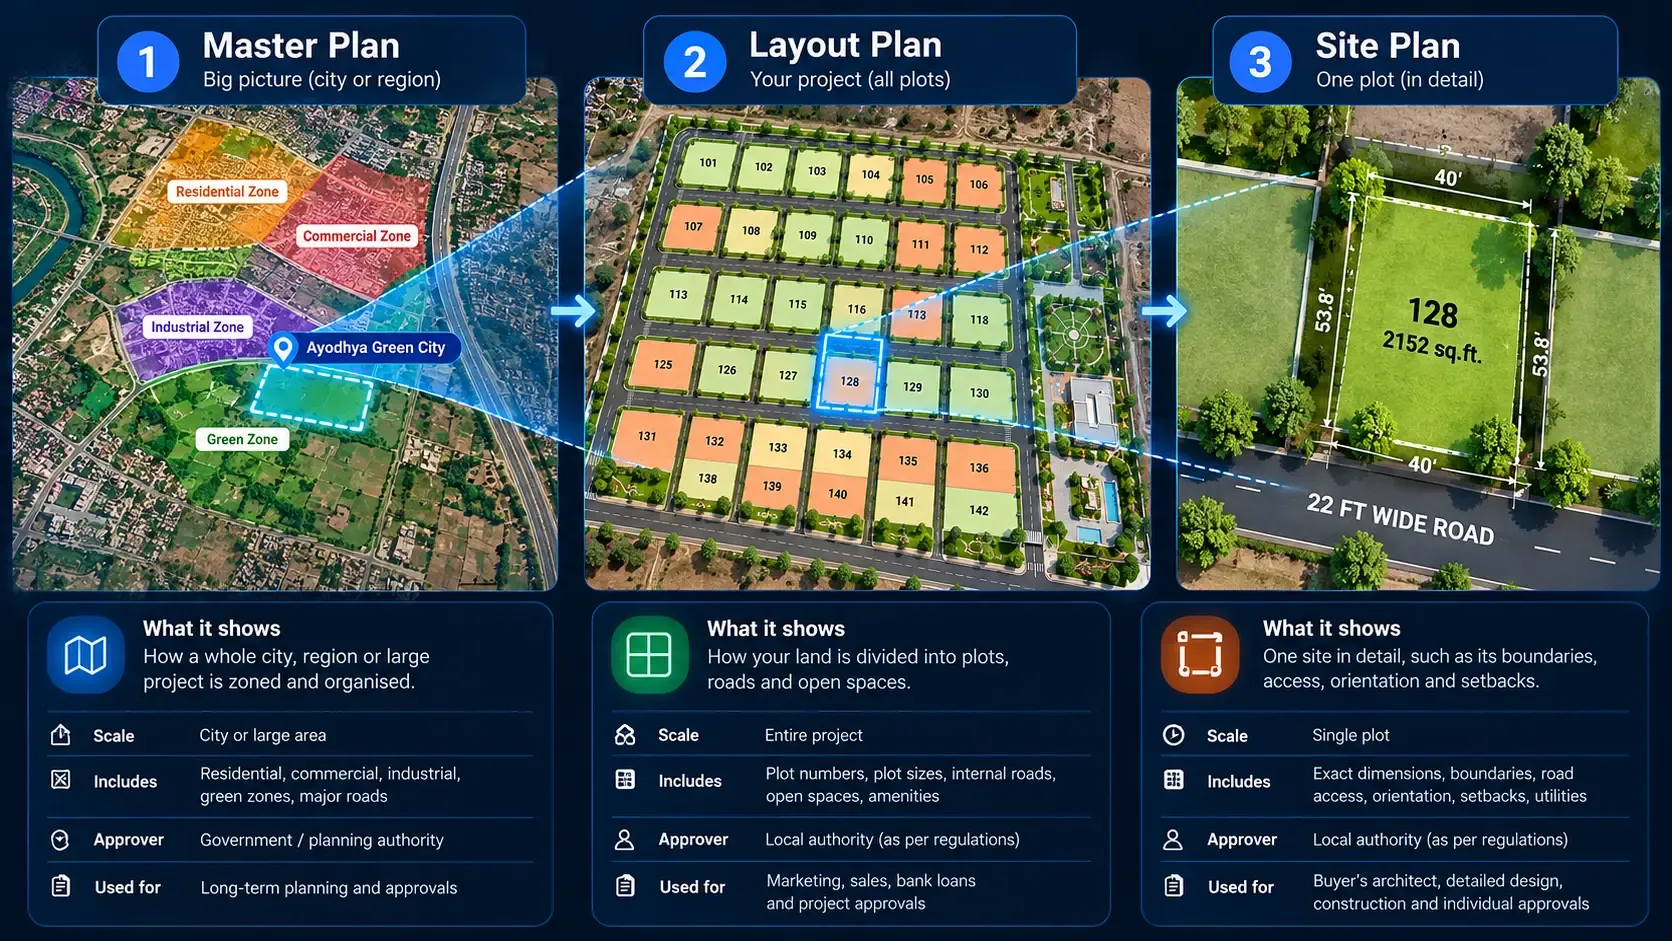
In a plotted project, the site plan, often called the layout plan, shows how the land is divided into plots, roads, open spaces and amenity areas. It is the drawing you will refer to most as a buyer. If you're unsure how it differs from a master plan, read our guide on site plan vs master plan vs layout plan.
A typical site plan shows:
- The boundary of the land and its survey numbers
- Every plot with its number, dimensions and area
- Internal roads with their widths
- Open spaces, gardens and amenity plots
- The entry gate and the main approach road
- Utilities and constraints such as drains, power lines and buffer zones
A site plan usually does not show:
- Live availability. A printed or PDF plan shows status only as of the day it was made.
- Prices, payment plans or charges
- The surroundings in detail, such as schools, hospitals or how far the highway really is
- What the ground looks like today, including slopes, trees or existing structures
Knowing these gaps tells you which questions you still need to ask after you have read the plan.
Before you start: make sure you have the right version
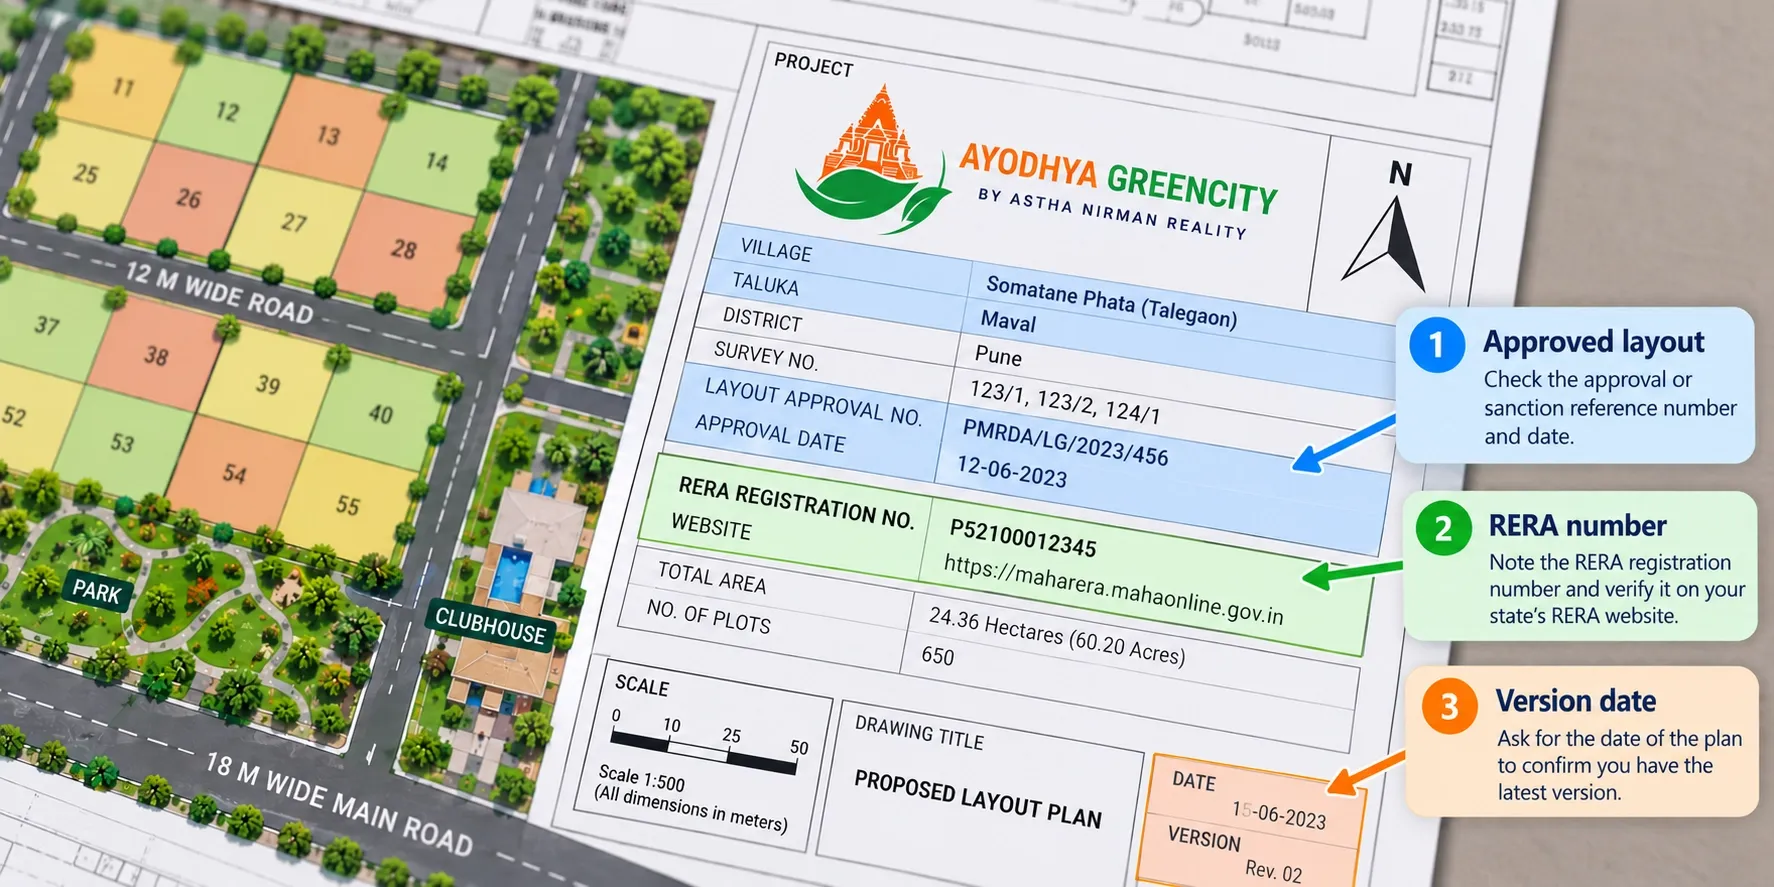
Many buyers study a plan carefully, only to find it was an old draft. Before you read anything else, check these three things.
1. Is it the approved layout?
Plotted layouts in India are approved by the local planning authority. The approved plan usually carries an approval or sanction reference and a date, often near the title block. A plan marked "draft", "proposed" or "for discussion" can still change.
2. Is the RERA number shown?
Under RERA, registered projects must show their registration number in advertisements and sales material. Note it down. You can look up the project, its approved layout and its phases on your state's RERA website.
3. Is it the latest version?
Ask the sales team for the date of the plan. Layouts are sometimes revised after approval, and brochures often lag behind. If two people have sent you different versions, ask which one is current.
How to read a site plan in 8 steps
Step 1: Read the title block
The title block is the box, usually in a corner, that identifies the drawing. It normally includes:
- Project name and developer
- Village, taluka and district
- Survey or khasra numbers of the land
- Total land area
- Approval reference and date
- Name of the architect or planner and the drawing number
Check that the survey numbers and village match the land records and the documents you have been given. This is the link between the drawing and the legal title.
Step 2: Find the north arrow and work out the facing
The north arrow shows which way is north on the drawing. Plans are not always drawn with north pointing up, so never assume.
Once you know north, you can work out your plot's facing. In most Indian plotted projects, "facing" refers to the side where the road is. A plot with the road on its east side is called east-facing.
Facing matters for many buyers because of Vastu preferences, sunlight and resale. East- and north-facing plots are often priced higher in many markets. Read the facing from the plan yourself rather than relying only on the price list.
Step 3: Understand the scale and units
The scale tells you how distances on the drawing relate to real distances, for example 1:500. In practice, you will rarely measure the drawing. Instead, rely on the dimensions written along each plot edge.
Pay more attention to units. Site plans in India may use feet, metres, square feet, square yards, square metres or local units like guntha. A few useful conversions:
- 1 square yard = 9 square feet
- 1 square metre = about 10.76 square feet
- 1 guntha = about 1,089 square feet
Make sure the area on the plan, the price list and your allotment letter all use the same unit. A plot quoted in square yards but billed in square feet can cause confusion later.
Step 4: Read the legend
The legend explains what each colour, hatch pattern and symbol means. Legends vary from project to project, so always read the one on your plan. Common items include:
- Residential plots, often in one colour, sometimes with villa or premium plots shaded differently
- Roads, with their widths marked
- Open space or garden, often shown in green
- Amenity space, set aside for a clubhouse, community hall or similar use
- Commercial plots or shops, usually near the gate or main road
- Utility areas, such as a sump, water tank, transformer or sewage treatment plant
- Boundary lines, including the project boundary and any setback or building lines
If a colour or symbol on the plan is not explained in the legend, ask what it means.
Step 5: Locate your plot and check its details
Find your plot by its number. In larger layouts, plots may be grouped into blocks or phases, so note the block too.
For your plot, check:
- Dimensions on every side. Plots are not always perfect rectangles. A plot with sides of 30 ft, 30 ft, 50 ft and 46 ft is irregular, and its area will not be a simple 30 × 50.
- Total area. The written area should match what the dimensions suggest. If it doesn't, ask why.
- Corner or not. Corner plots have roads on two sides. Some buyers prefer them for light and access; others avoid them for privacy. They are often priced at a premium.
- What it shares a boundary with. Another plot, a park, a road, a drain or the project boundary wall.
Step 6: Check the roads
Roads affect daily access, future value and, in many areas, what you can build. On the plan, check:
- Width of the road in front of your plot. It is usually written along the road, for example "9 M wide road" or "30 ft road".
- How your road connects. Follow it to the main internal road and the gate. Watch for dead ends and long detours.
- The approach road outside the project. A wide internal road matters less if the road leading to the project is narrow.
In many places, the permitted building height and setbacks depend on the width of the road your plot faces. Your architect will check this, but it helps to know early.
Step 7: Look at what surrounds your plot
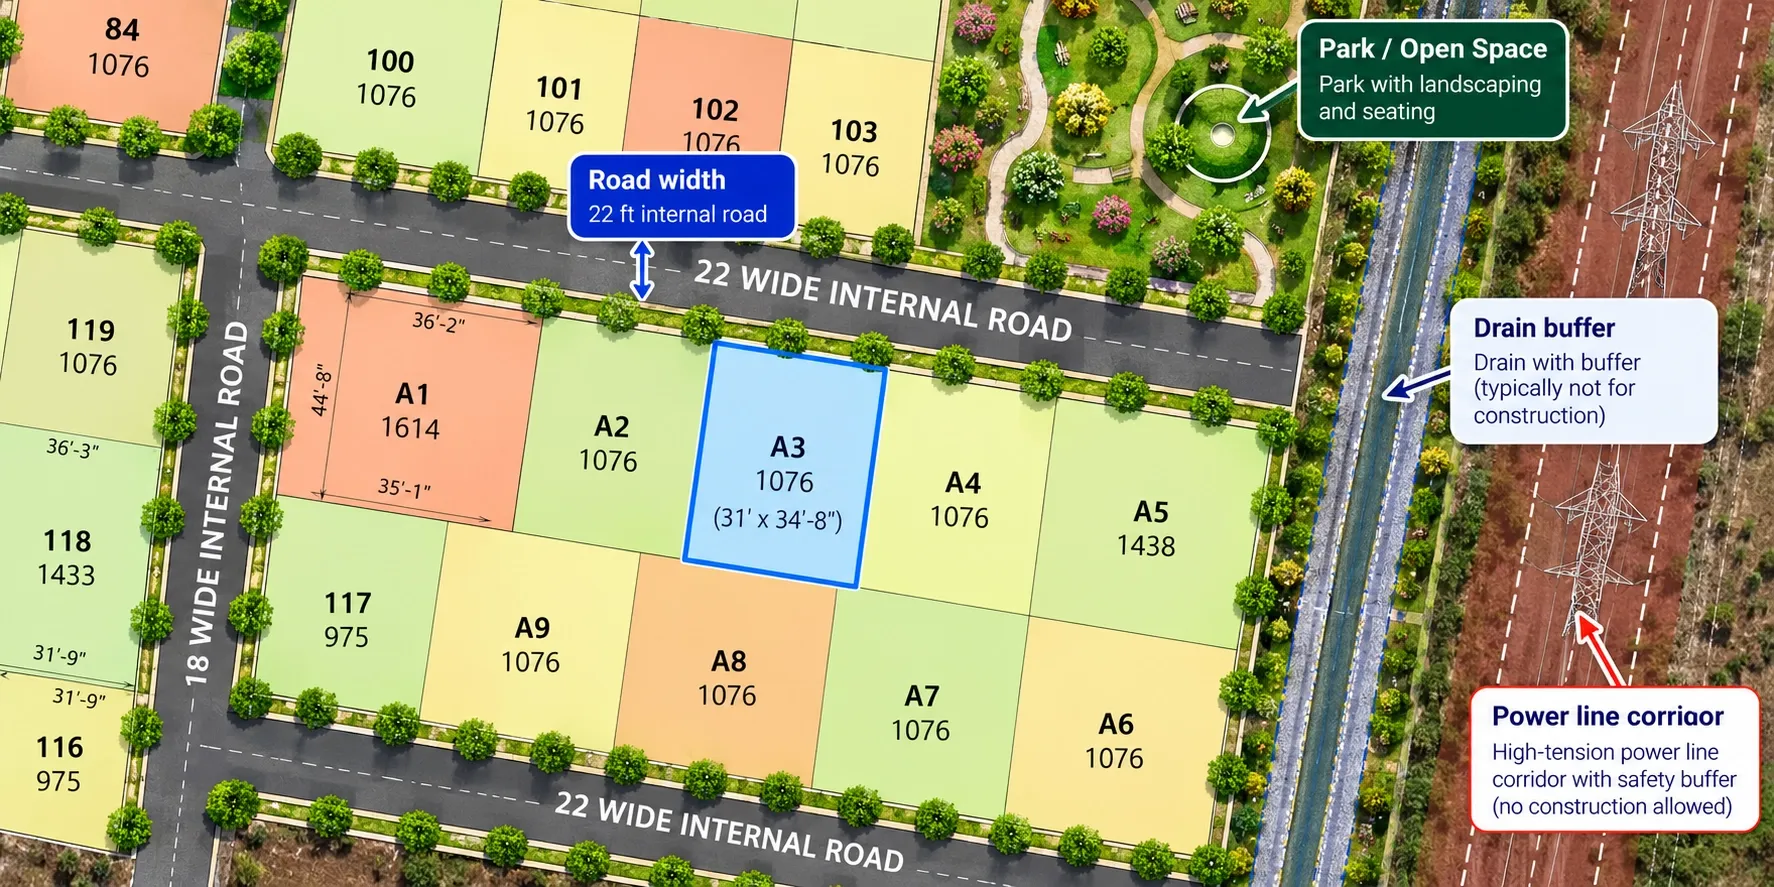
This is where many buyers miss things. Scan the area around your plot for:
- Open spaces and parks. Park-facing plots are popular. Confirm the park is marked as permanent open space, not "future development".
- Amenity and commercial areas. A clubhouse nearby is a plus. A shop row or a sewage treatment plant next door may not be.
- Drains and nalas. A natural drain near your plot can mean waterlogging and a buffer zone where you can't build.
- High-tension power lines. These usually come with a corridor where construction is restricted.
- Reserved or acquired land. Land marked for a future road widening, a public purpose or a utility can change what is next to you.
- Setback or building lines. These dotted lines inside a plot show where construction can start. The usable building area is smaller than the plot area.
Step 8: Match the plan to the ground
A site plan is a drawing. Before you pay, check it against reality.
- Find the project on a map and check the approach road, nearby areas and distances to schools, hospitals and highways.
- On the site visit, ask to see the boundary stones or markers for your plot.
- Walk the road in front and check its actual width.
- Check that the park, drain or amenity marked near your plot is where the plan says it is.
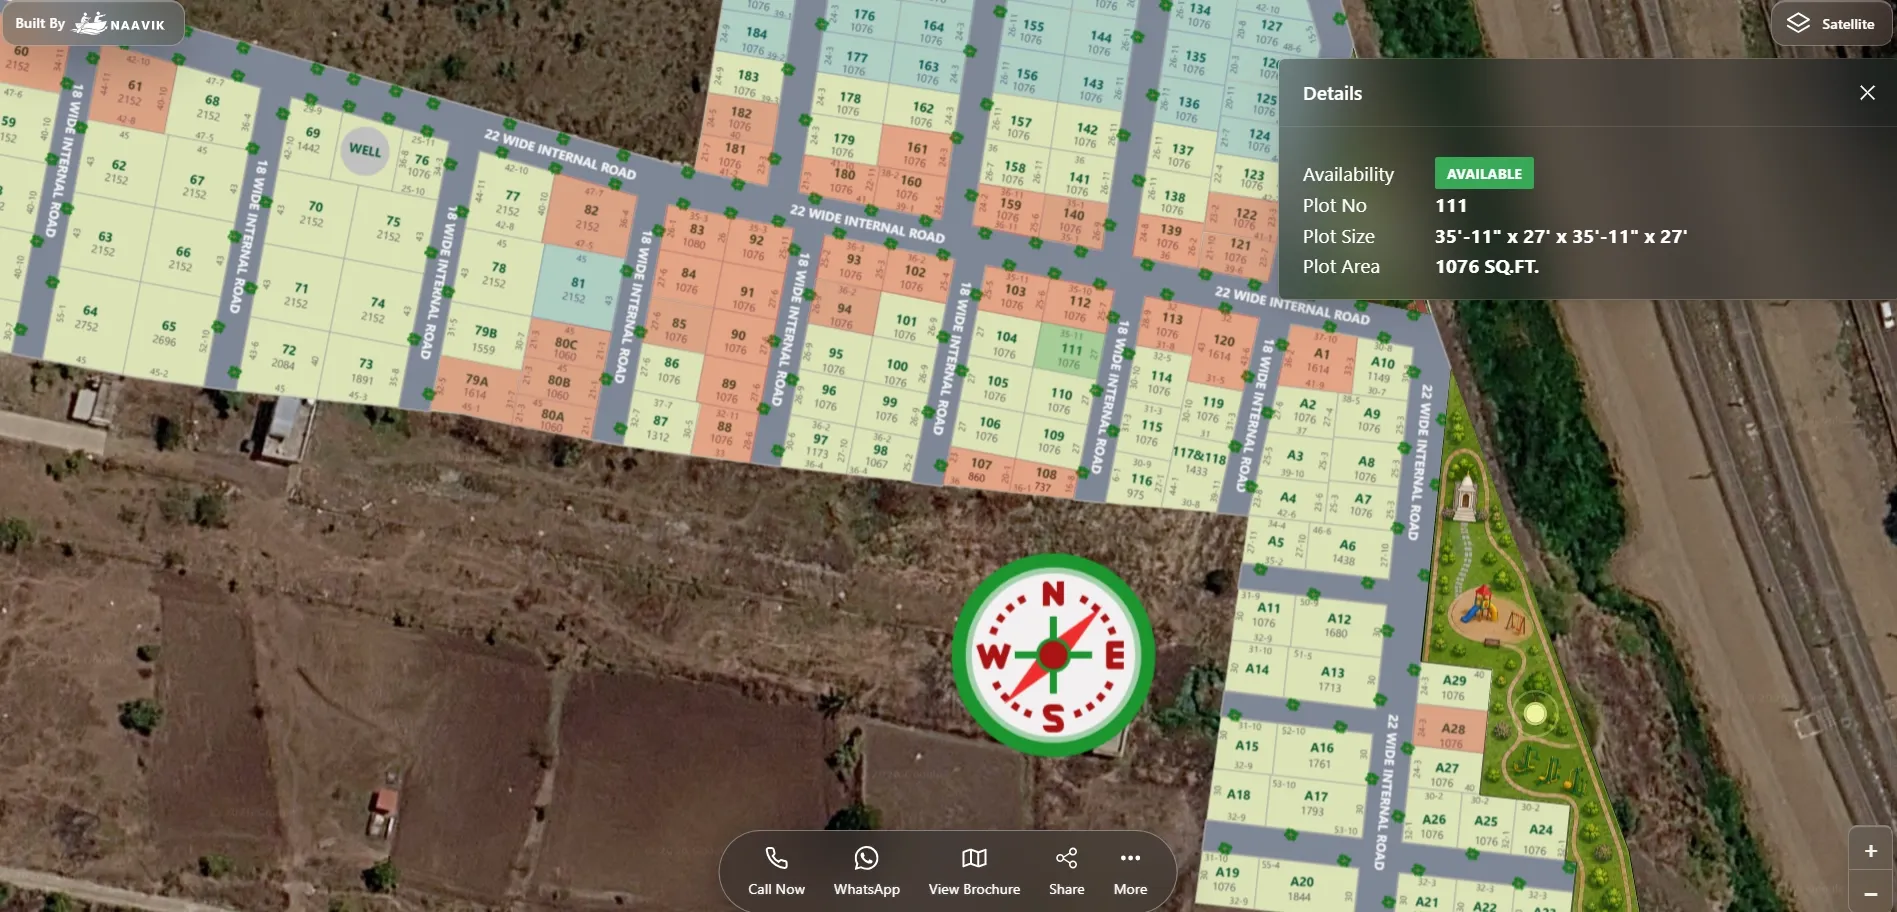
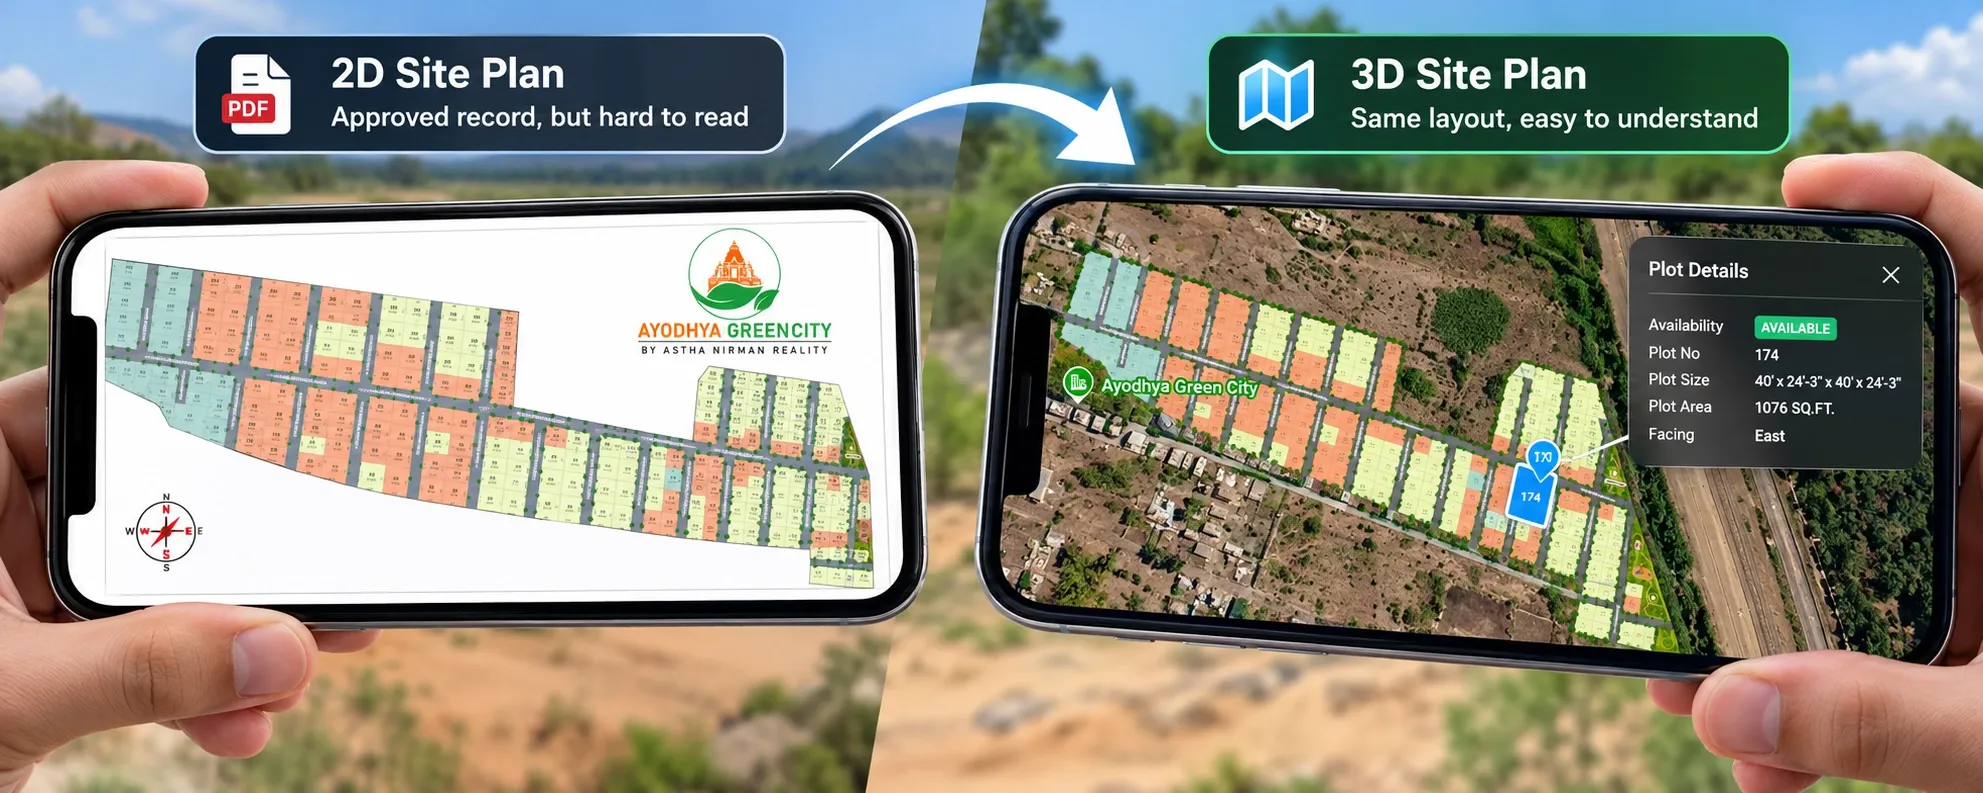
If you can't visit, ask for a live video walk of the plot. Many developers now share map-based layouts that show the plot in its real location. Our comparison of 2D vs 3D site plans explains how 3D and map views help buyers picture a plot remotely.
Red flags when reading a site plan
Pause and ask questions if you notice any of these:
- No approval reference, date or RERA number on the plan
- Plot dimensions and area that don't add up
- Plot numbers that differ between the brochure, the price list and the plan
- A "park" or "open space" next to your plot marked as future development or with no clear label
- A drain, nala or power line close to your plot with no buffer shown
- Different versions of the plan from the sales team and a broker
- Plots shown in a future phase with prices, when that phase isn't approved yet
- A plan that only exists as a blurry screenshot, with no clear copy available
None of these automatically means the project is a problem. They do mean you need clear answers in writing before you book.
Example: reading plot 37 in a 120-plot layout near Vadodara
This is an illustrative scenario, not a client case study.
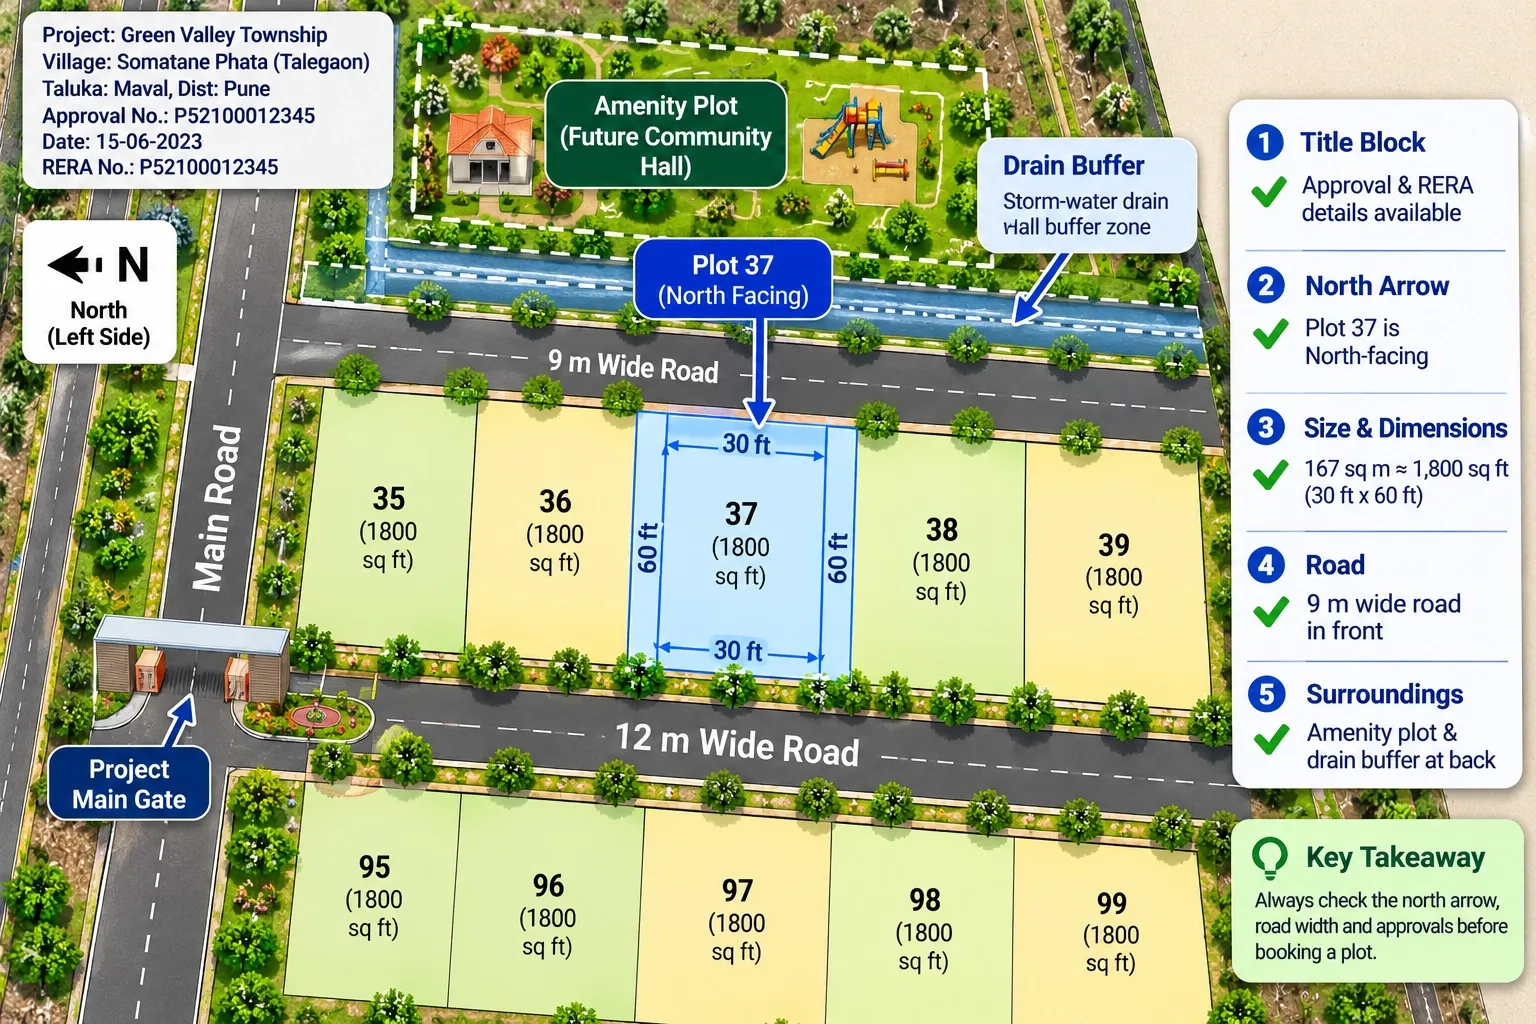
Meera, who works in Pune, is buying a plot in a 120-plot project near Vadodara. Her broker sends a site plan and recommends plot 37 as "east-facing, 200 sq yd, near the garden".
Meera reads the plan step by step:
- Title block: the approval reference and date are present, and the RERA number matches the state RERA website.
- North arrow: north points to the left of the sheet, not up. Using it, she finds that the road in front of plot 37 is actually on the north side. The plot is north-facing, not east-facing.
- Units: the plan shows 167 sq m. That is about 1,800 sq ft, or 200 sq yd, so the size matches.
- Dimensions: the sides are 30 ft, 60 ft, 30 ft and 60 ft. The area works out to 1,800 sq ft. No issue.
- Road: the road in front is 9 m wide and connects directly to the main road near the gate.
- Surroundings: the "garden" is actually an amenity plot, labelled for a future community hall. A storm-water drain runs along the back of the plot, with a dotted buffer line.
Meera asks the developer three questions in writing: confirm the facing, explain what will be built on the amenity plot, and confirm the drain buffer and whether it reduces the buildable area. The answers help her choose a similar plot two rows away, facing a permanent open space, at a similar price.
Questions to ask the developer before you book
Use your reading of the site plan to ask specific questions:
- Is this the latest approved layout? What is the approval reference and date?
- What is the RERA registration number, and which phase does my plot belong to?
- What are the exact dimensions and area of my plot, and in which unit will it be billed?
- Which side does the road face, and how wide is it?
- What is planned on the open space and amenity plots near my plot?
- Are there any drains, power lines, buffer zones or reserved land that affect my plot?
- Is this plot available right now, or is it on hold for another buyer?
- Can I see the boundary markers for this plot on site?
The answer to question 7 matters more than many buyers expect. A plan sent last week may already be out of date. If you're buying from another city, our guide on selling plots online shows what a reliable remote buying process looks like from the developer's side.
For developers: make your site plan easy to read
Everything in this guide is work buyers do on their own, often on a phone, often with a plan that is hard to read. Every point of confusion turns into a call to your sales team or a buyer who quietly drops off. Our list of site plan presentation mistakes covers the most common ones.
Plotter by Naavik.ai is plot management software that turns static layouts into interactive 3D site plans with real-time plot availability.
With Plotter, your approved layout becomes an interactive site plan for real estate placed over Google Maps or OpenStreetMap. Buyers tap a plot to see its number, size, facing and status: available, booked, hold or sold. Nearby landmarks and connectivity sit on the map, so buyers don't have to guess distances. They can enquire on WhatsApp or by phone, and use GPS navigation to reach the plot on a site visit. For larger projects, see how an interactive masterplan handles phases and hundreds of plots.
The result is fewer repeat explanations for your sales team and buyers who arrive at the site already knowing which plot they want.