A buyer has opened your layout PDF on WhatsApp three times. He has zoomed in, scrolled around, and still calls your sales team to ask: "Which way does Plot 32 face, and how far is it from the main road?"
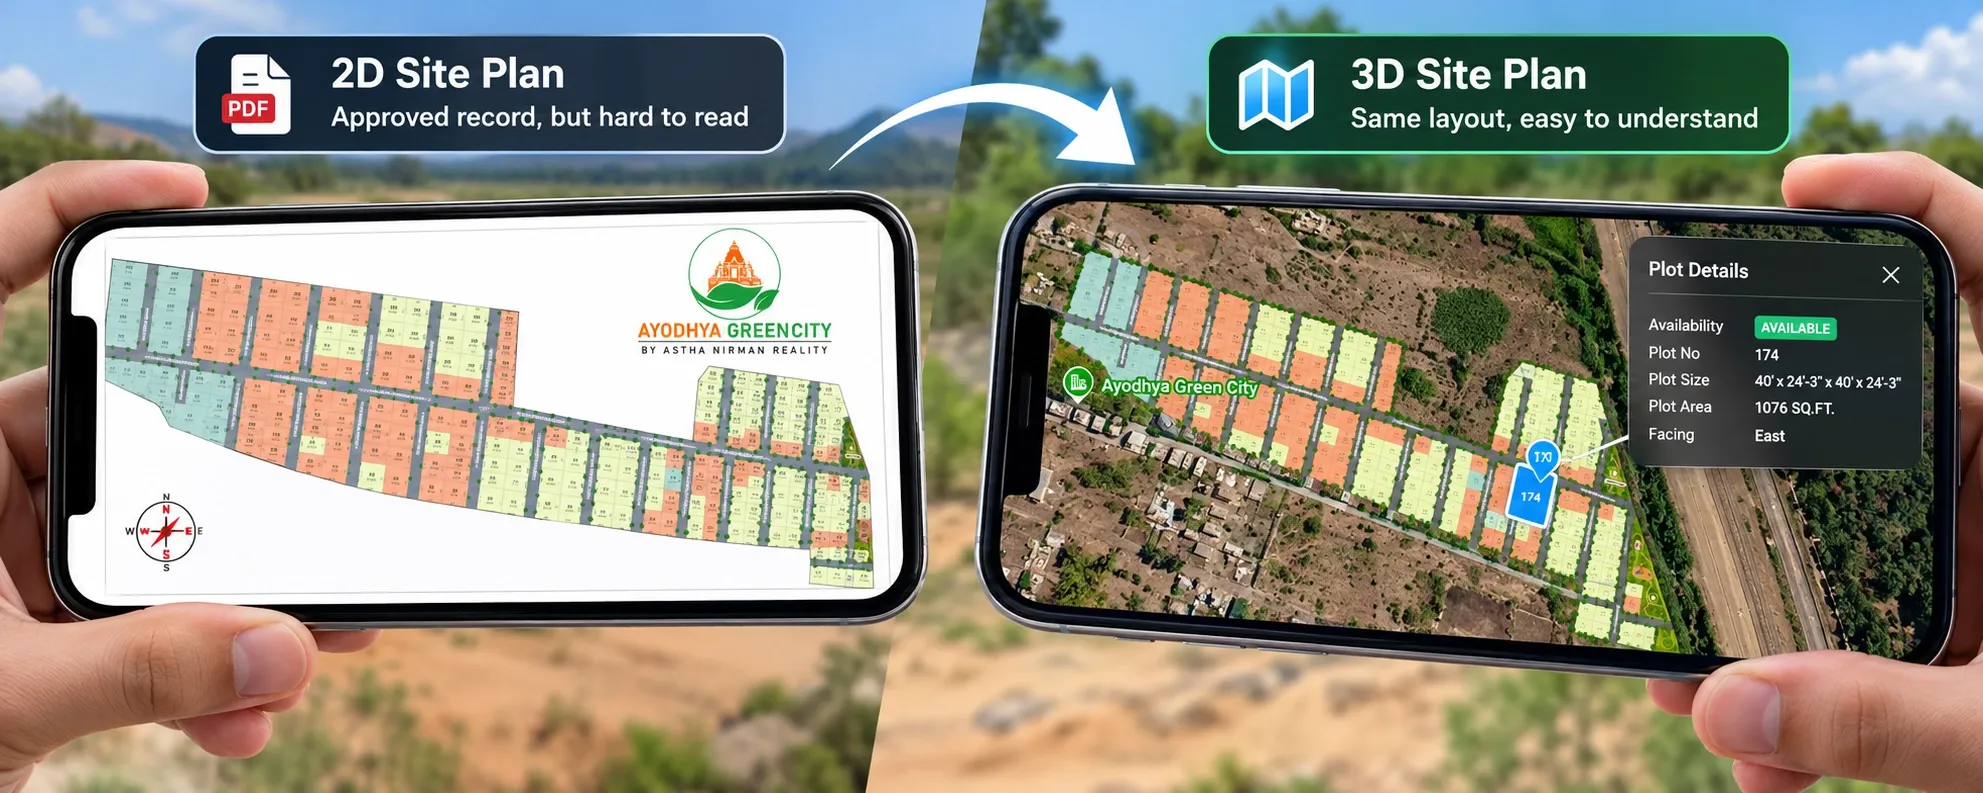
That call is the real difference between a 2D and a 3D site plan. A 2D site plan is the approved record of your project. It is accurate, but most buyers struggle to read it. A 3D site plan placed over the map shows the same layout in a way buyers understand at a glance, which is why it helps them decide faster. The best approach for land developers is to keep both, each for its own job.
This guide compares the two side by side, shows where each one fits, and explains how to use them together on a plotted project.
Key takeaways
- A 2D site plan is the technical and legal record of your layout. Keep it for approvals, RERA filings and sale documents.
- Buyers decide on location, facing, road access and surroundings. A 2D drawing makes them work hard to find these answers.
- A 3D site plan over the map answers those questions visually, so buyers shortlist plots faster and ask fewer basic questions.
- 3D only works if it matches the approved 2D layout exactly. Accuracy builds trust; a pretty but wrong view destroys it.
- The best setup uses 2D for records and 3D, with live plot status, for sales and marketing.
What a 2D site plan shows, and where buyers get stuck
A 2D site plan is the flat, top-down drawing of your project. It shows plot numbers, plot boundaries, dimensions, road widths, open spaces and amenity areas. Your architect or surveyor prepares it, and it goes to the planning authority for approval.
For your team, it is the single source of truth. For buyers, it is often confusing.
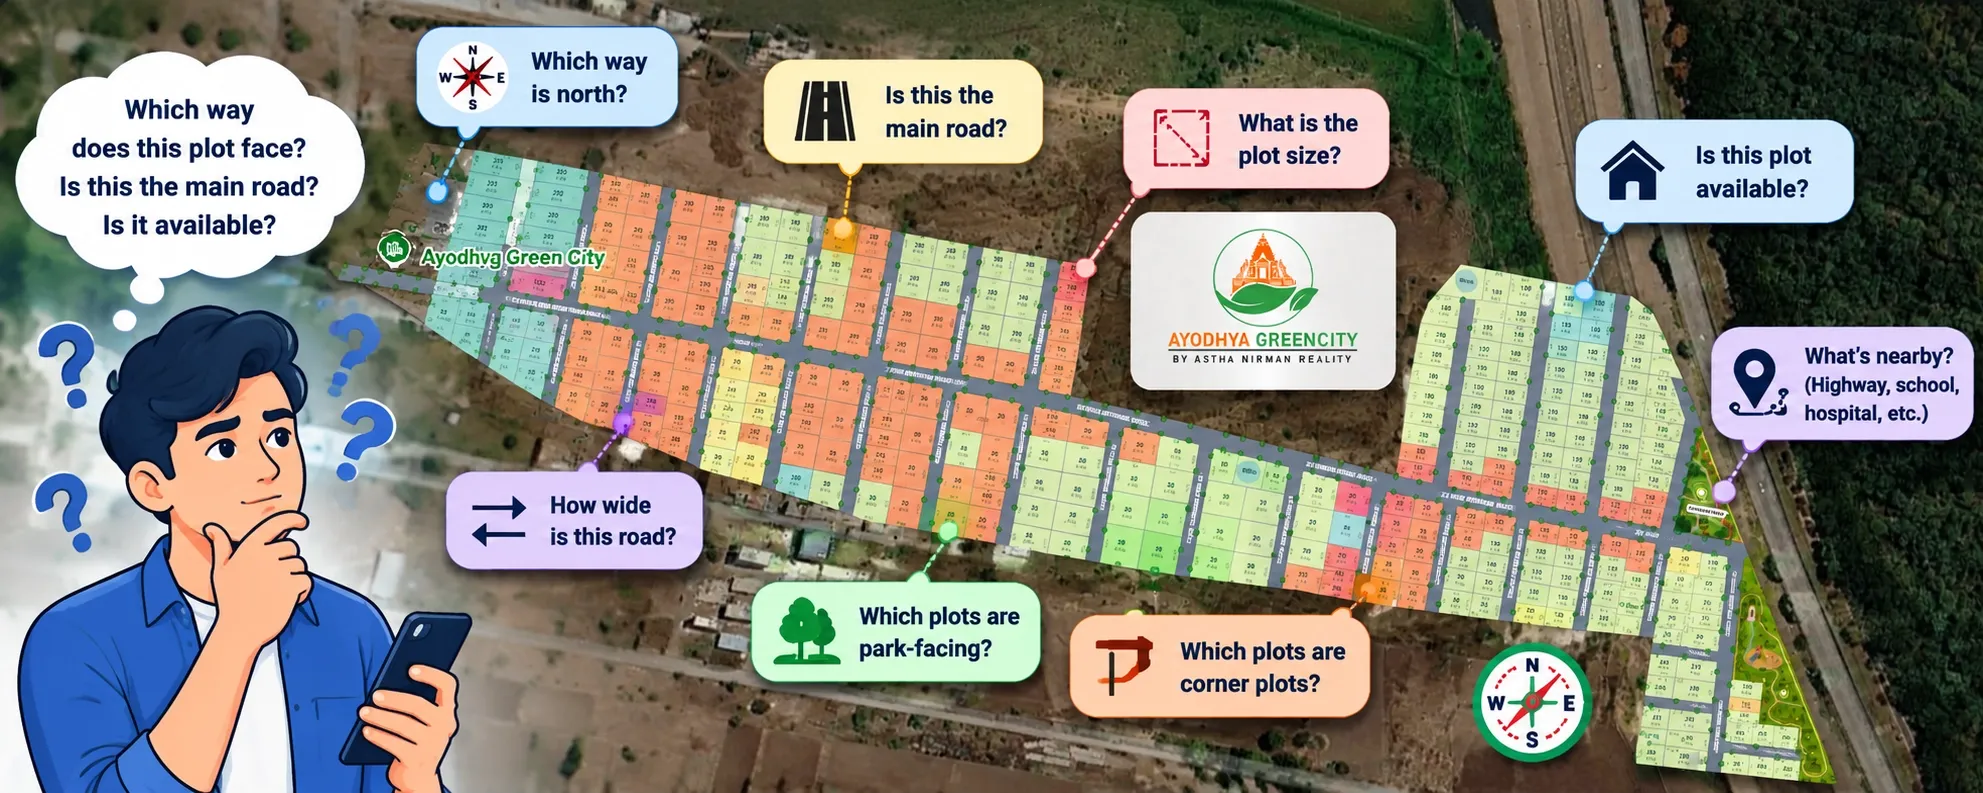
Most buyers don't read technical drawings every day. When they open a 2D layout, they run into the same problems again and again:
- Facing: the north arrow sits in a corner, so buyers can't tell quickly whether a plot faces east or west.
- Scale: a 200 sq yd plot and a 300 sq yd plot look almost the same on a phone screen.
- Roads: road widths are written as small numbers, so buyers can't picture a 9 m road against a 12 m road.
- Corner and park-facing plots: these are easy to miss unless someone points them out.
- Surroundings: the drawing usually stops at the project boundary. The highway, school or railway station nearby isn't there at all.
- Availability: a PDF can't show which plots are still free. It is out of date as soon as the first plot is booked.
Each of these gaps turns into a phone call, a WhatsApp message or another site visit. Your sales team ends up explaining the same drawing over and over.
What a 3D site plan on the map adds
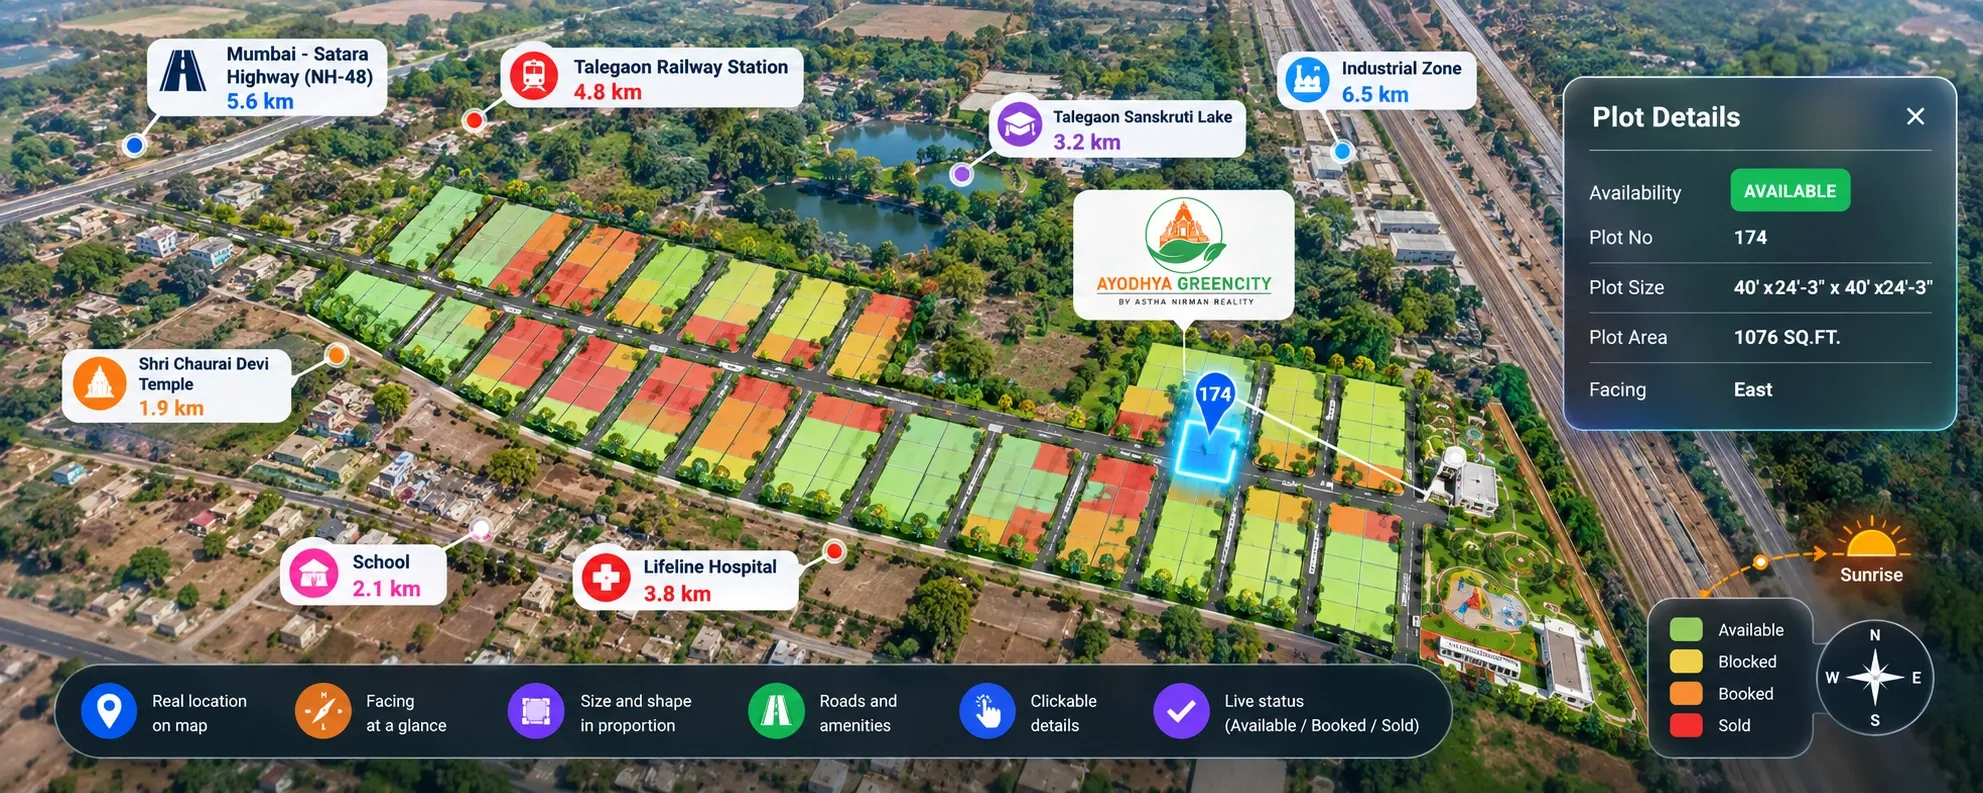
A 3D site plan turns the same layout into a visual model. When it is placed over Google Maps or OpenStreetMap, buyers see your plots in their real location, surrounded by real roads and landmarks.
This changes how buyers explore a project:
- Real location: buyers see where the project sits in relation to the highway, the city and the places they care about.
- Facing at a glance: the layout is aligned to the map, so buyers can see which plots face the sunrise or the main road.
- Size and shape: plots look in proportion to each other, so corner plots and larger plots stand out.
- Roads and amenities: buyers can follow the internal roads and see how far the park, gate or clubhouse is from a plot.
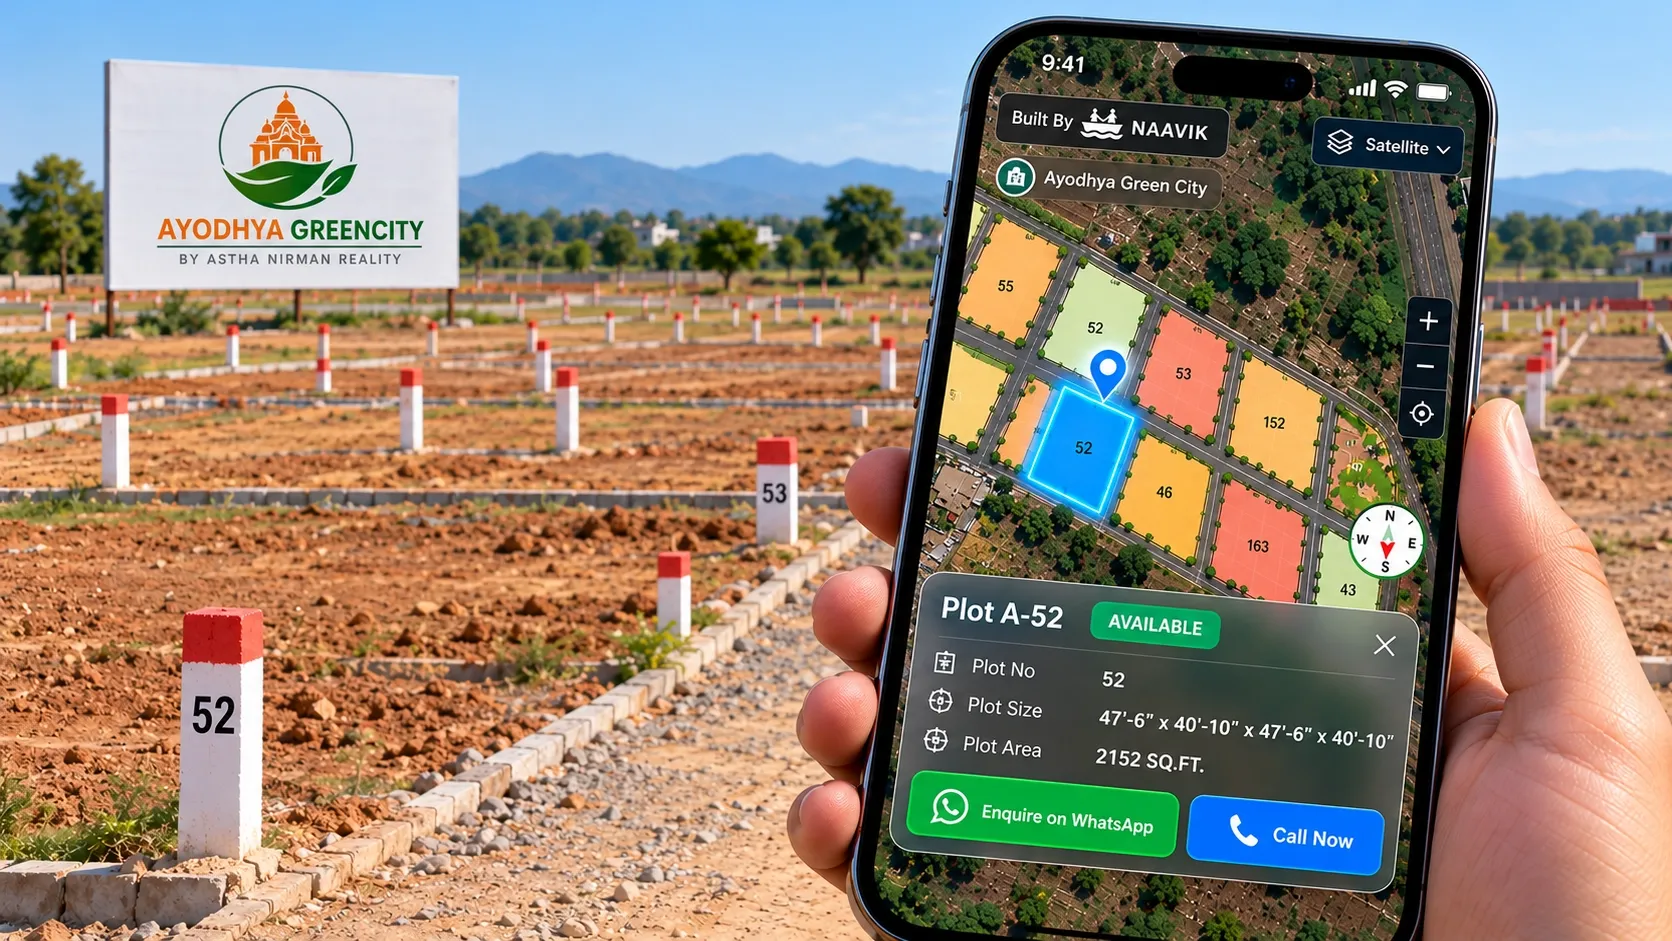
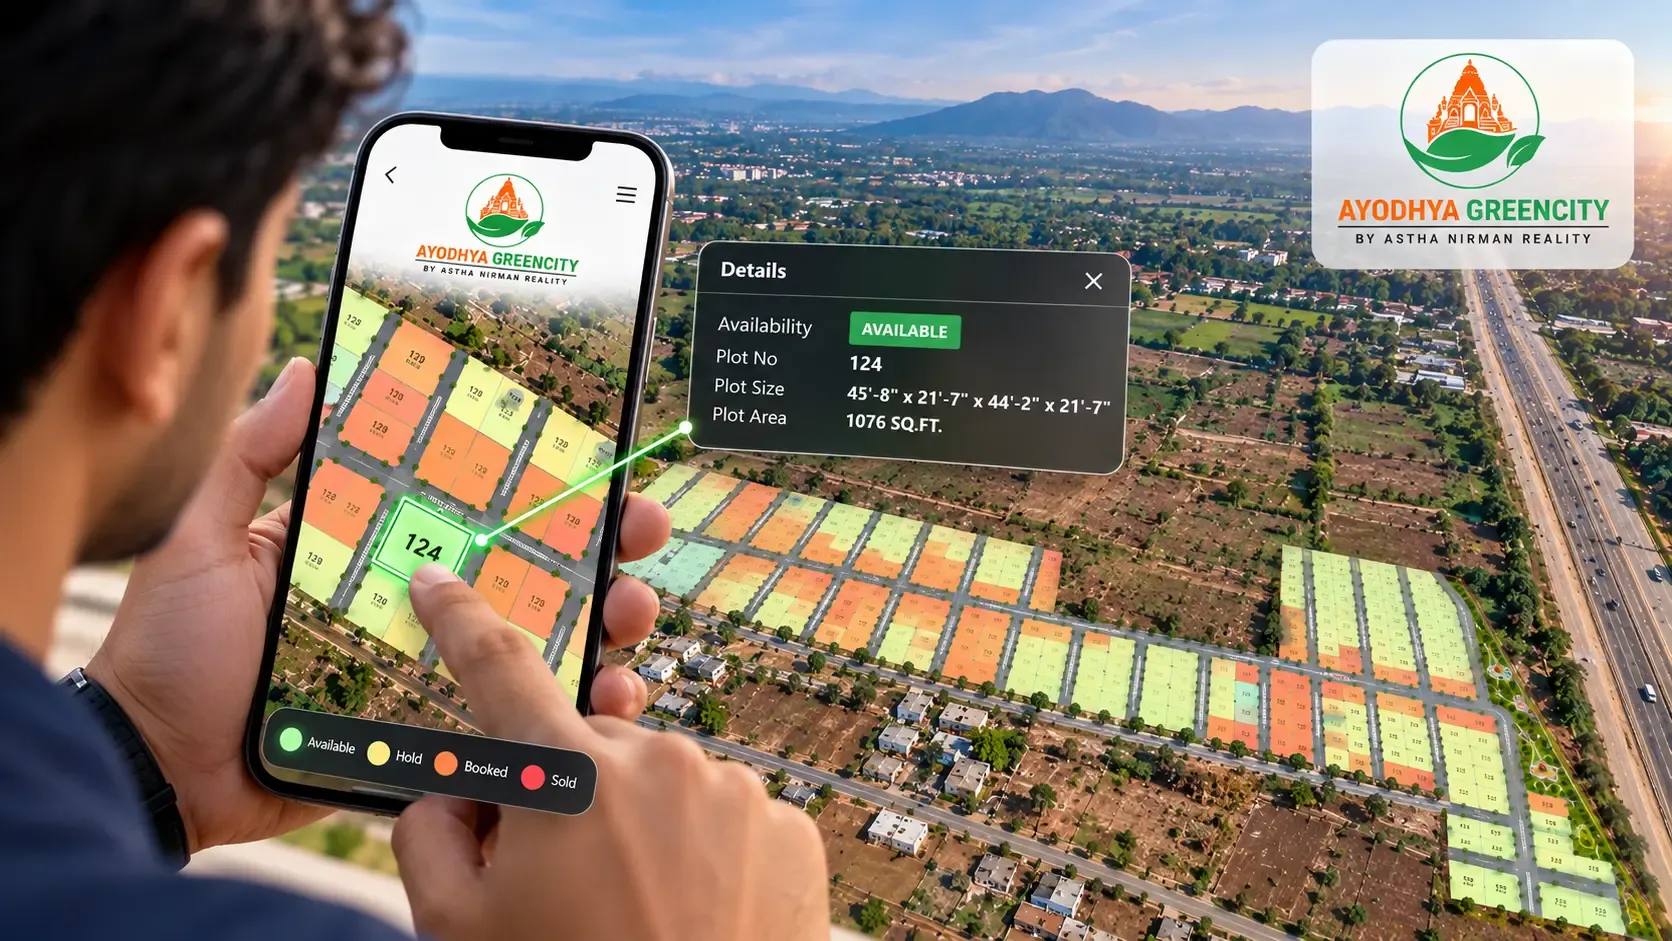
- Clickable details: tapping a plot shows its number, size, facing and current status.
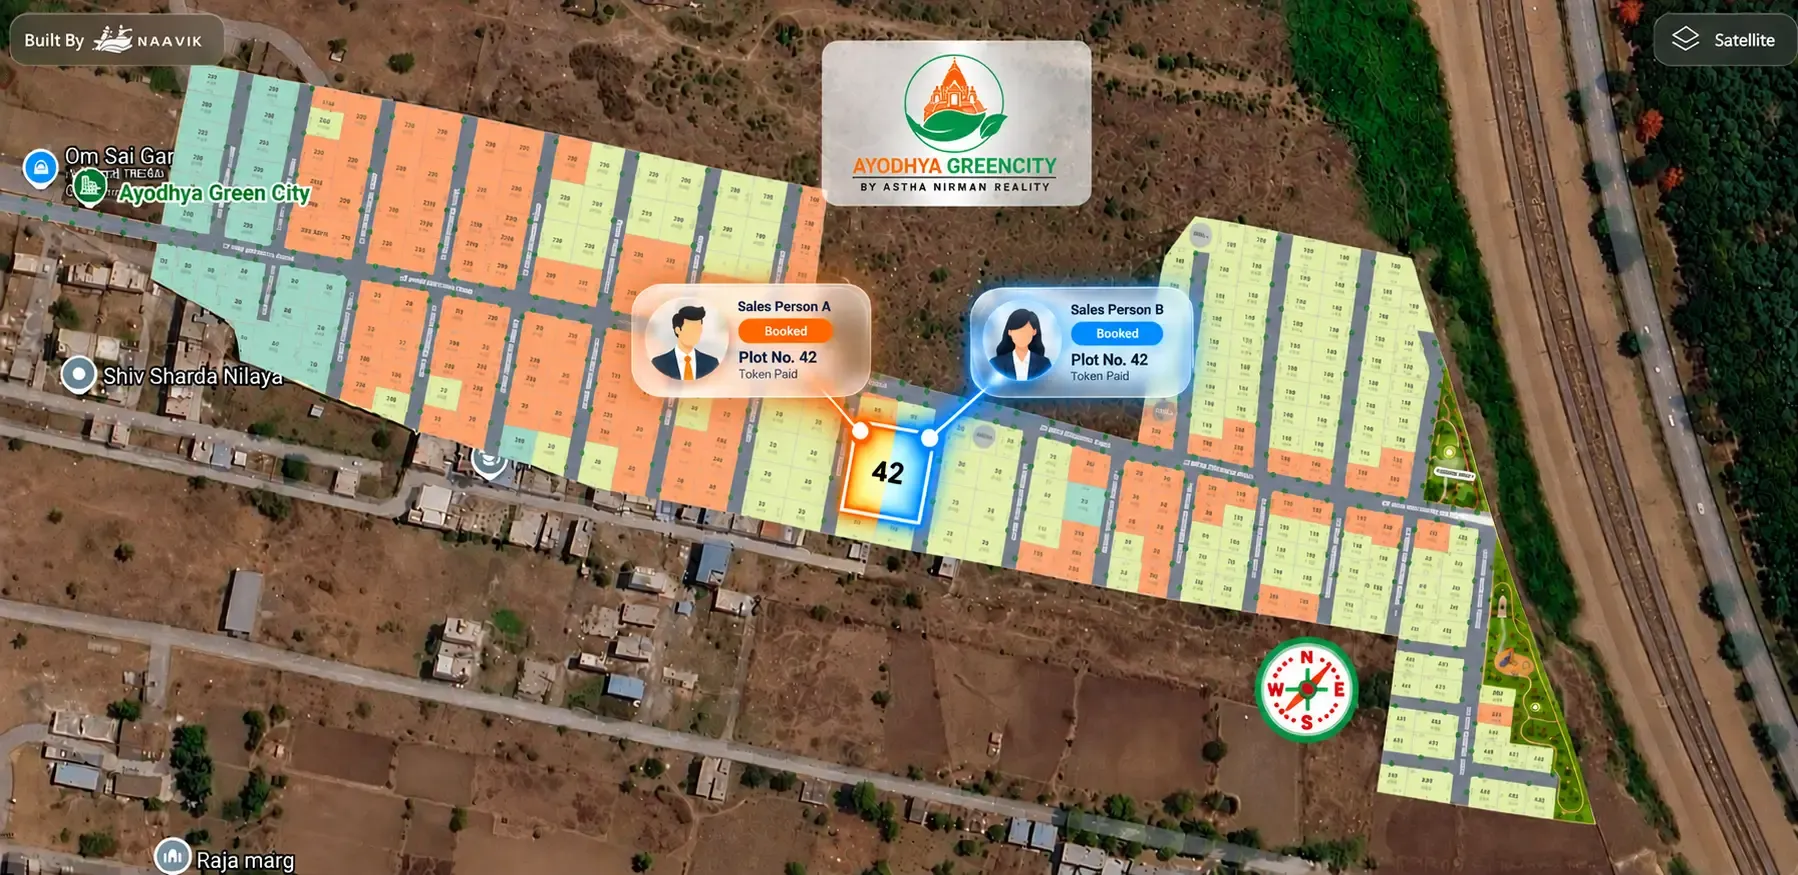
- Live status: each plot can show whether it is available, booked, on hold or sold, so buyers stop asking about plots that are already gone.
This is what 3D plot visualisation means in practice. It is less about impressive graphics and more about giving buyers answers before they have to ask.
2D vs 3D site plan: side-by-side comparison
Here is how the two compare on the questions plot buyers ask most often.
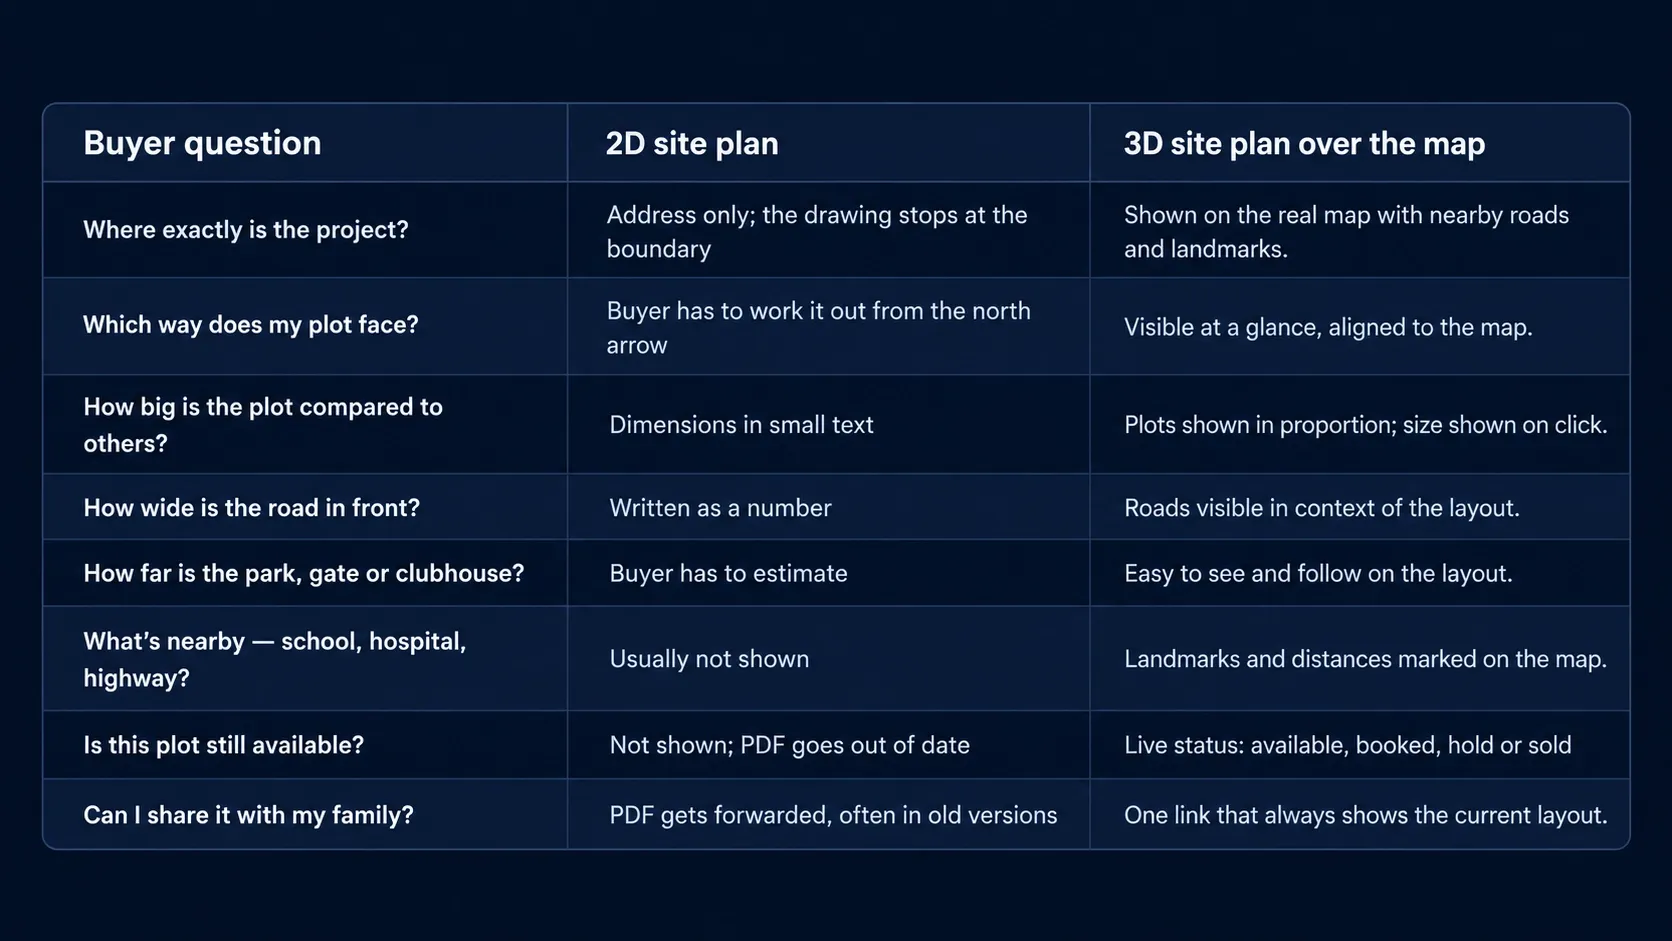
The pattern is clear. A 2D plan answers questions only for people who know how to read it. A 3D plan answers them for everyone.
When a 2D site plan is still the right tool
None of this makes the 2D plan less important. It does a job that a 3D view cannot replace.
Use the 2D site plan for:
- Approvals: planning authorities approve the technical layout, not a 3D model.
- RERA registration: your registered layout is the reference for what you promise buyers.
- Sale documents: agreements and sale deeds refer to plot numbers and dimensions from the approved plan.
- Survey and site work: demarcation, road marking and utility planning all follow the 2D drawing.
- Disputes: if a buyer questions a boundary, the approved 2D plan settles it.
So the question isn't really "2D or 3D". It is which one you put in front of buyers, and which one you keep as your record.
How to use 2D and 3D together
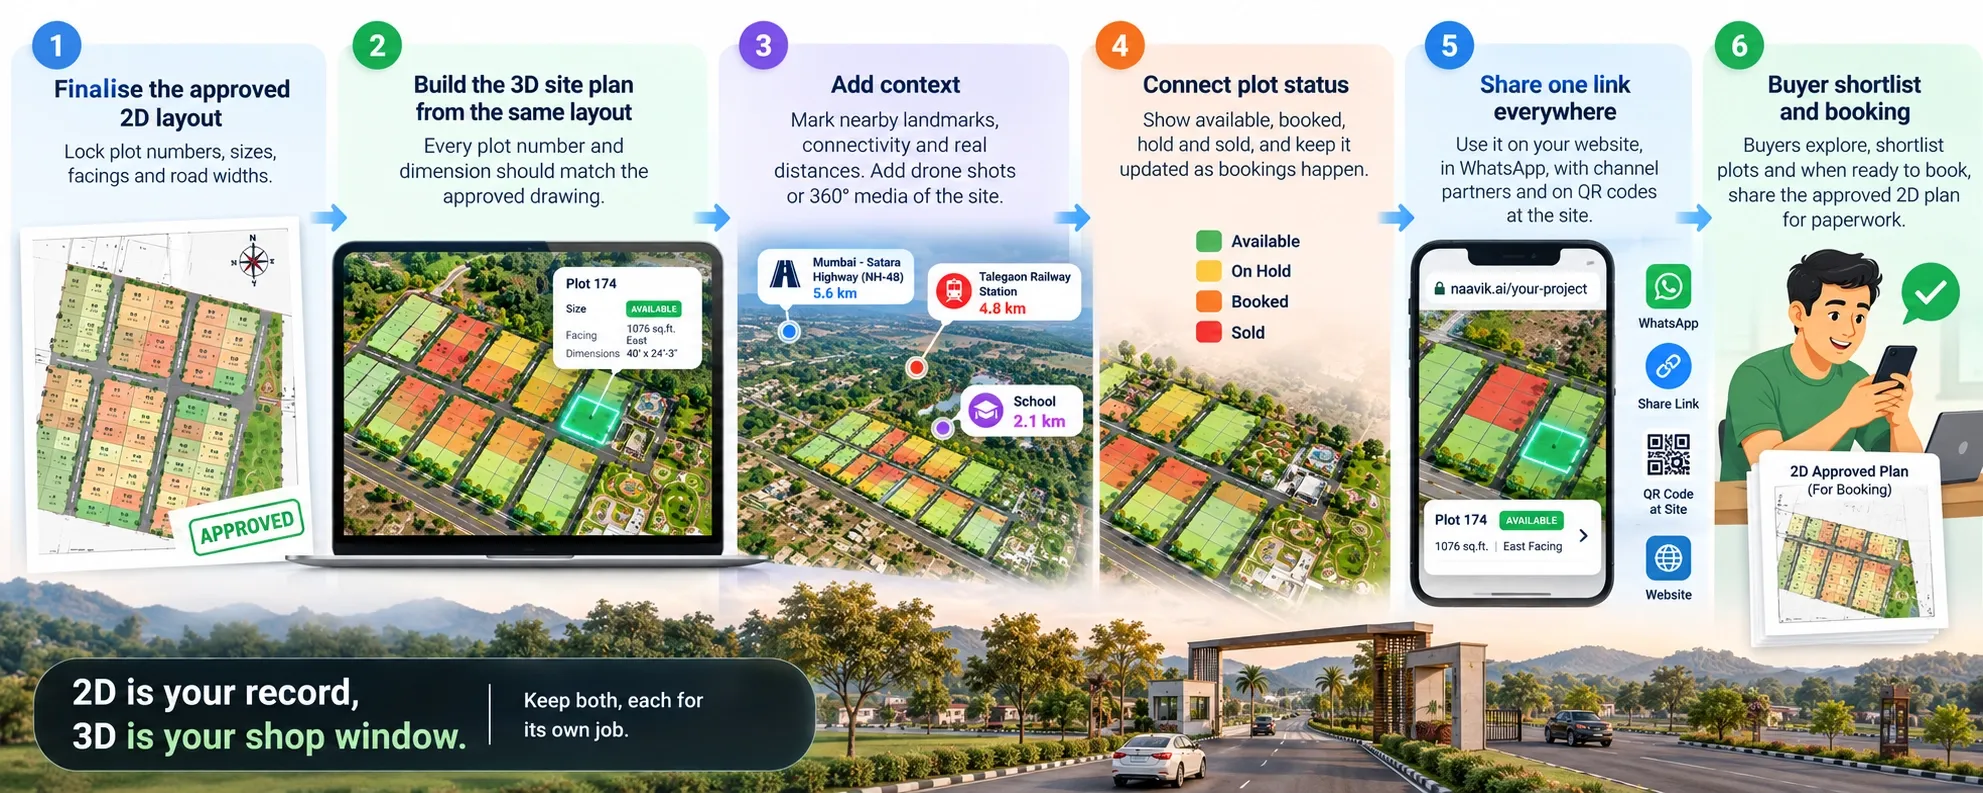
The simplest way to think about it: 2D is your record, 3D is your shop window.
- Finalise the approved 2D layout. Lock plot numbers, sizes, facings and road widths.
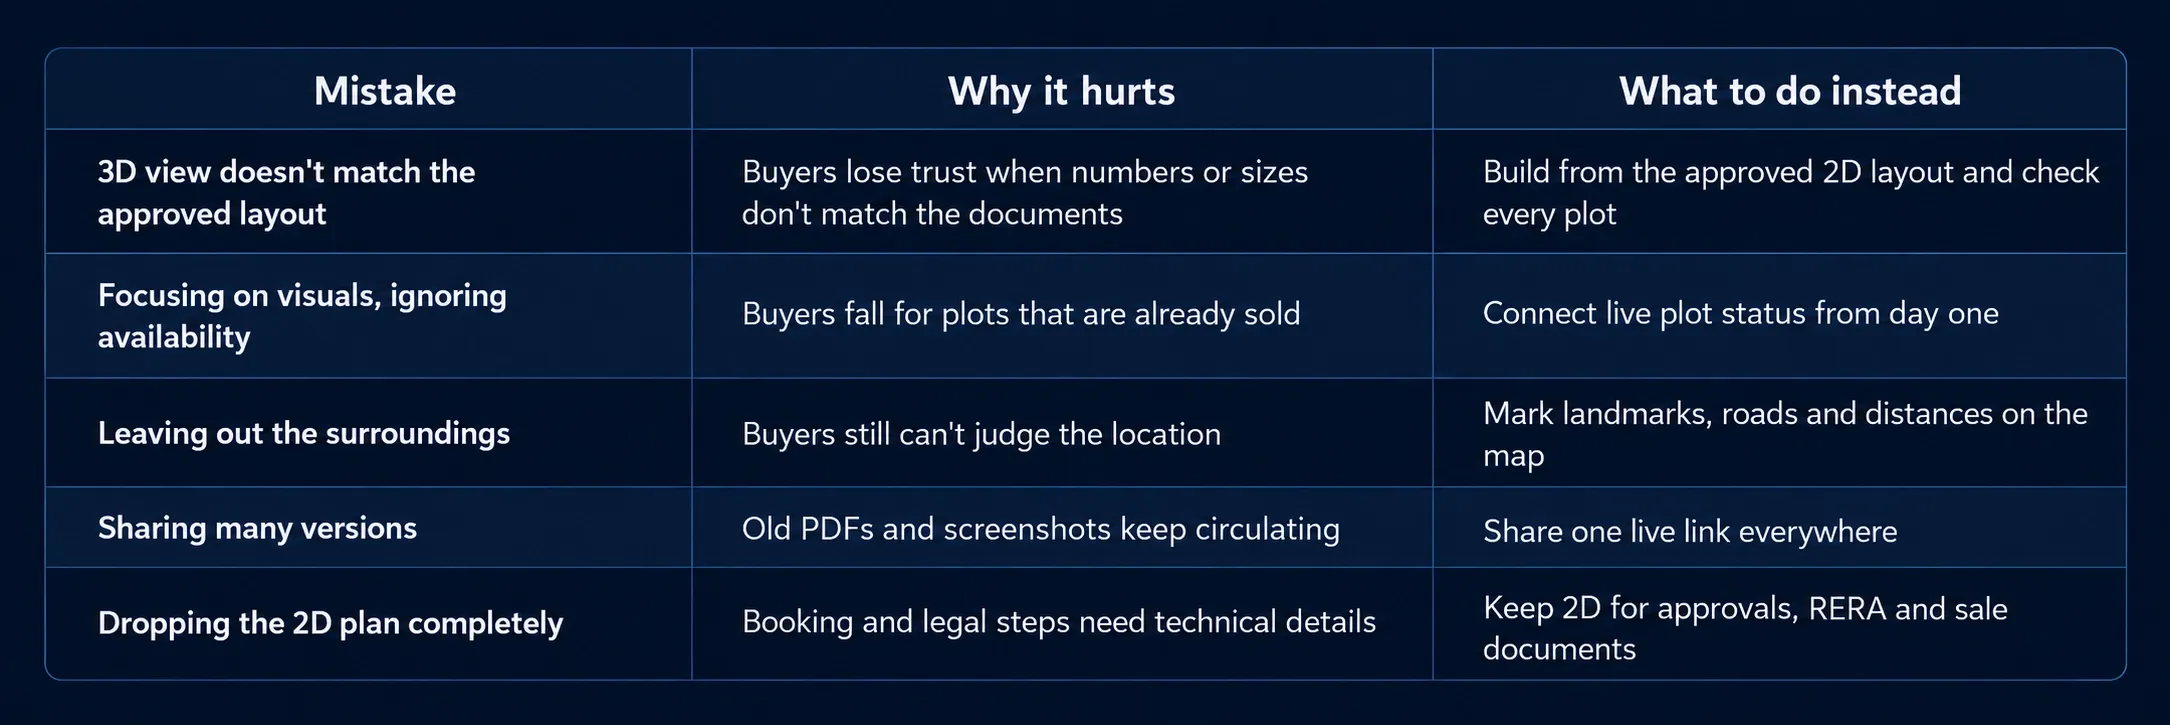
- Build the 3D site plan from the same layout. Every plot number and dimension should match the approved drawing. Check it plot by plot before you go live.
- Add context. Mark nearby landmarks, connectivity and real distances. Add drone shots or 360° media of the site.
- Connect plot status. Show available, booked, hold and sold, and keep it updated as bookings happen. Our guide on how to prevent double booking of plots explains how to set this up.
- Share one link everywhere. Use it on your website, in WhatsApp, with channel partners and on QR codes at the site.
- Keep the 2D plan for paperwork. Share it when a buyer is ready to book and needs the technical details.
If your project hasn't launched yet, a 3D view matters even more, because buyers are looking at bare land. We cover this in our playbook on how to market plots before development starts.
Example: a 90-plot project near Ahmedabad
This is an illustrative scenario, not a client case study.
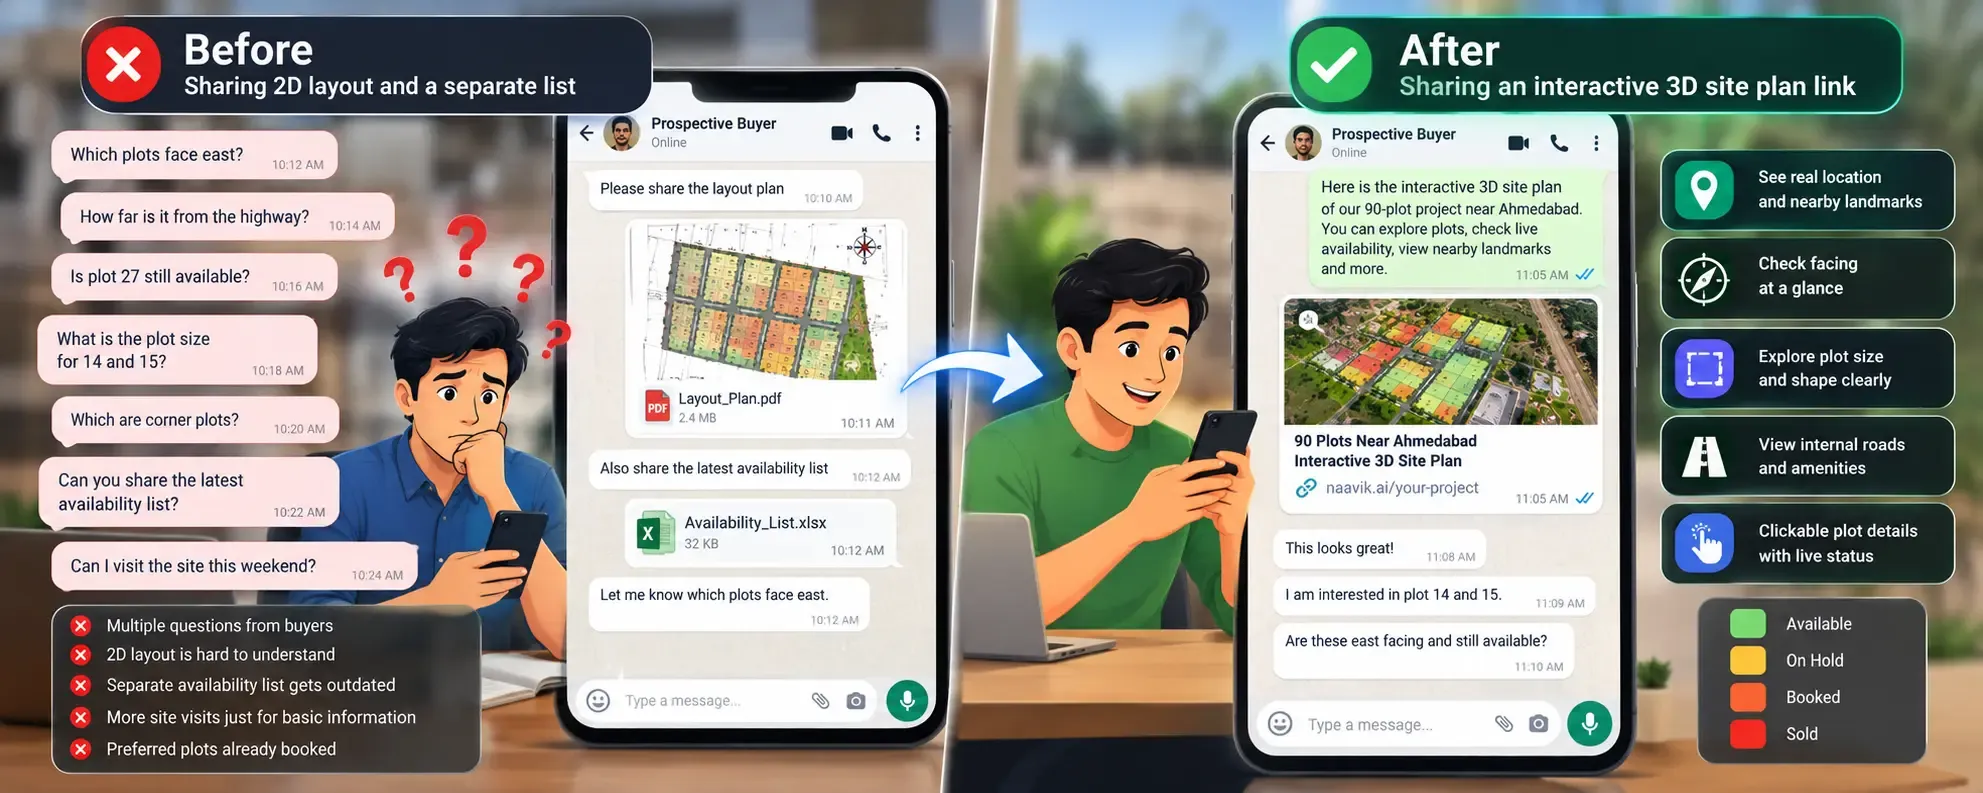
Before. A developer is selling a 90-plot project on the edge of Ahmedabad. The sales team shares the approved 2D layout as a PDF on WhatsApp, along with a separate availability list that is updated every few days. Buyers keep calling to ask which plots face east, how far the plots are from the highway, and whether a plot on the list is really still free. Many ask for a site visit just to understand the layout. Some arrive, find their preferred plot already booked, and leave disappointed.
After. The developer builds a 3D site plan over the map from the same approved layout. Nearby landmarks are marked, and each plot shows its live status. The sales team shares one link instead of a PDF and a list.
Buyers now explore the project on their phone first. They can see the east-facing plots, check the distance to the highway and skip plots that are already booked. When they call, they ask about two or three specific plots instead of the whole layout. Site visits become confirmation visits, and the 2D plan is shared at the booking stage for the paperwork.
Common mistakes when moving from 2D to 3D
Where Plotter by Naavik.ai fits
Plotter by Naavik.ai is plot management software that turns static layouts into interactive 3D site plans with real-time plot availability.
You start with your approved layout. Plotter places it over Google Maps or OpenStreetMap, so buyers see each plot in its real location along with nearby landmarks and connectivity. Every plot is clickable and colour-coded as available, booked, hold or sold, so the view buyers explore is also the view your sales team trusts.
Enquiries come in through WhatsApp or call buttons and go into the built-in CRM with the plot attached. You can embed the layout on your website, share it as a link or QR code, and add a virtual site tour and 360° media. The analytics dashboard shows visitors, leads and bookings, so you can see how buyers use the layout.
Our case study shows how one developer "Replaced Static PDFs With a Live Interactive Site Layout", and Shyam Infrastructure uses Plotter to manage 1,200+ units in real time. You can see how this looks on a live project at Ayodhya Green City in Pune. For more on why buyers respond to this format, read interactive property maps vs traditional brochures.